


53 days until 06-01-13… For those of you who don’t know yet, that’s the day I’ll be marrying my highschool (not sweetheart) but crush. 🙂 I’ve waited a LONG time for this day….but now, 53 days out, panic is starting to set in! There’s so much still left to do, so that’s pretty much where my mind will be until the day comes. So I figured why not make this a series in the blog?! Maybe it will help other brides out there….what NOT to do! 🙂 Don’t wait until the last minute, or you’ll find yourself in a panic like me!
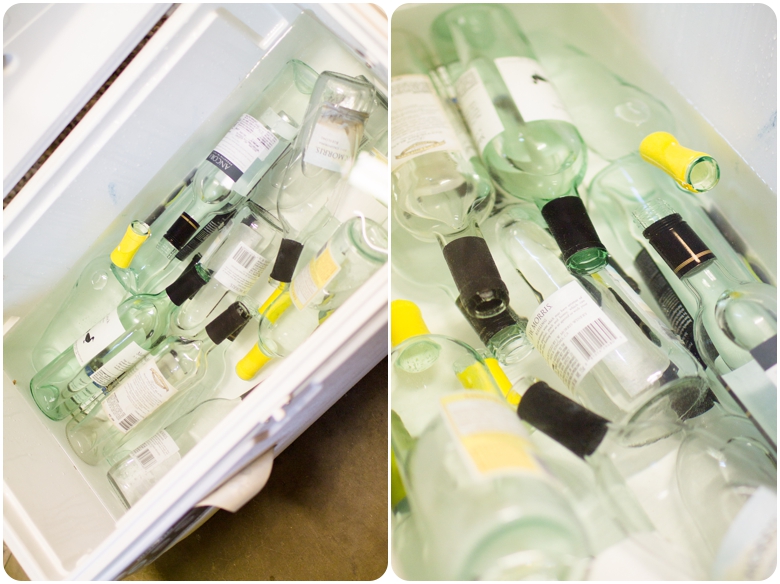
Anyway, this week (or the past few weeks) we’ve been working on our centerpieces! Lover of DIY crafts, and being on a budget, I’ve probably taken on a bit too much. But I must say, I feel pretty awesome saying that I’ve been cutting wine bottles! Yep, all those cool ideas that you see using wine bottles on Pinterest, then wonder…how did they cut those?! Well, I figured it out. With the help of YouTube and one of Calvin’s good friends, I think we came up with a pretty good system!
So. Of all the things I’ve pinned…and pinned…and pinned some more, that will never come to fruition. This is one that actually happened. Bare with me as I try to explain this with the photos I was able to grab…it’s tough taking photos of myself doing something!
How To Cut Wine Bottles:
Things You’ll Need:
-Wine bottles (Luckily these were easy to come by thanks to some awesome friends who have contributed. Although, I wonder if I should be concerned. :))
-Large bucket or cooler filled with HOT water
-Razor blade
-Goo Gone
-Candle
-Bottle/Glass Cutter
-Ice
-Wet/Dry Sand Paper
-Glass File
Step 1: Sink bottles in the hot water and let soak. Some will need to soak longer than others. I must say, Barefoot wine and the 5 buck chucks from Trader Joe’s were our favorites, because the labels came loose almost instantaneously! So thank you to all my friends who drink cheap wine! 🙂 The fancy wine bottles were the ones that seemed like no matter how long you soak them, those labels weren’t going anywhere!!
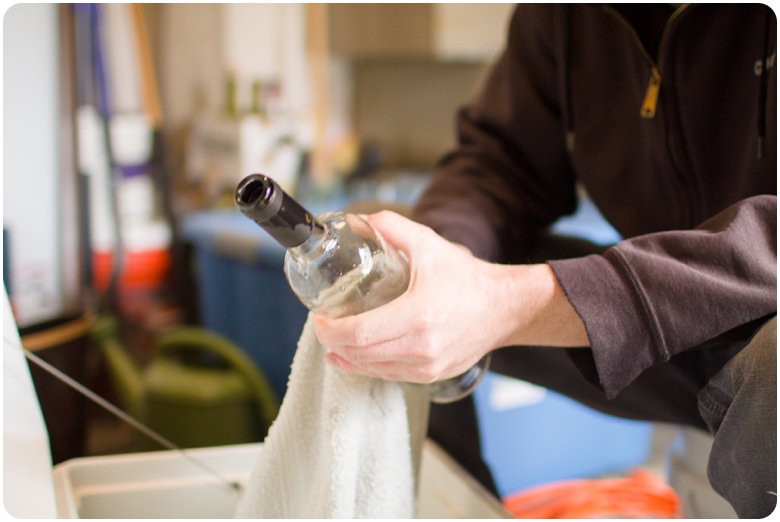
Step 2: Scrape off the labels. Some could be done by hand. Others you’ll need to bring in the razor blade, then wipe all the excess goo off with Goo Gone! [This was Calvin’s part of the job, I’m pretty sure he asked me three times that day how much it would have cost to just buy vases. :)]
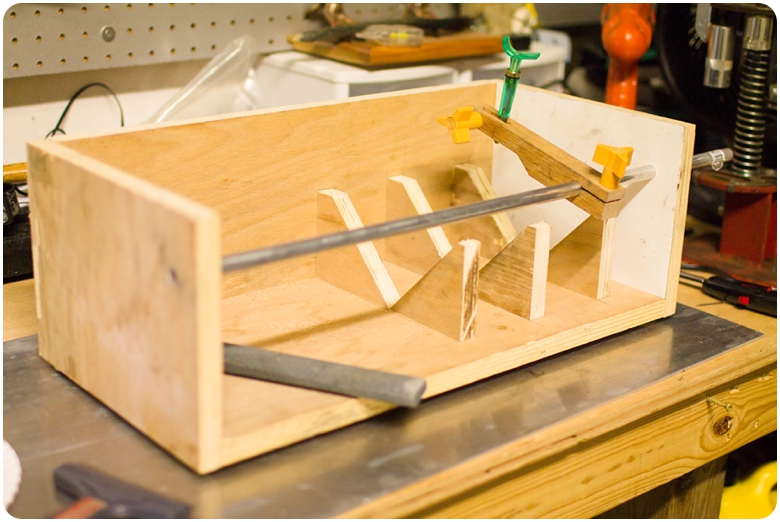
Step 3: Score the wine bottles.
Okay, this is probably the most complex part of this craft. We lucked out that Calvin has a great friend who is pretty much a do it all kind of guy. He MADE this contraption for us so we wouldn’t have to buy an an actual bottle cutter. But here’s a link to a bottle cutter you can purchase that works essentially the same way.
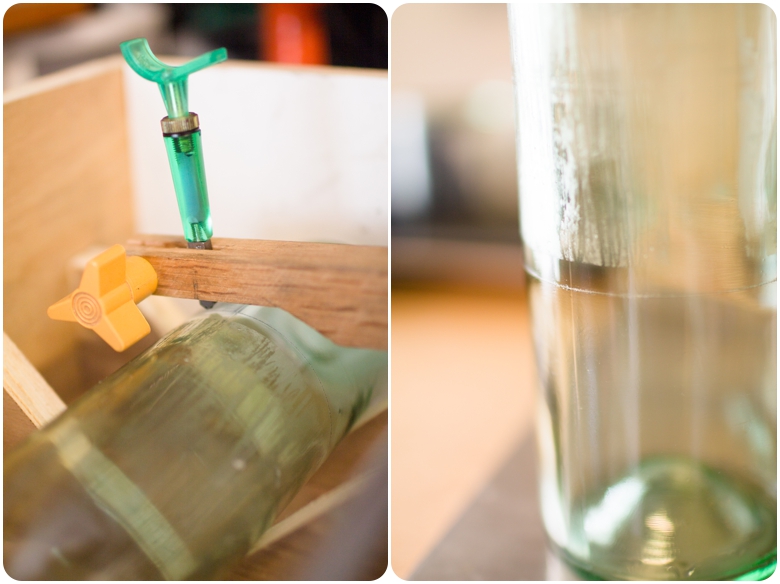
Basically, I lay the bottle in there, push down the arm with the green pen and spin the bottle slowly. The key is to not push too hard. You barely need any pressure and try not to go over the same cut twice. All you need is the tiniest of a score in the bottle to create a ‘weakness’ in the glass.
Here’s an example of the process up close. See that line on the bottle on the right? That’s literally all you need. If you put too much pressure on it, you chance having the bottle crack in multiple spots because you’ve weakened that area of the glass too much.
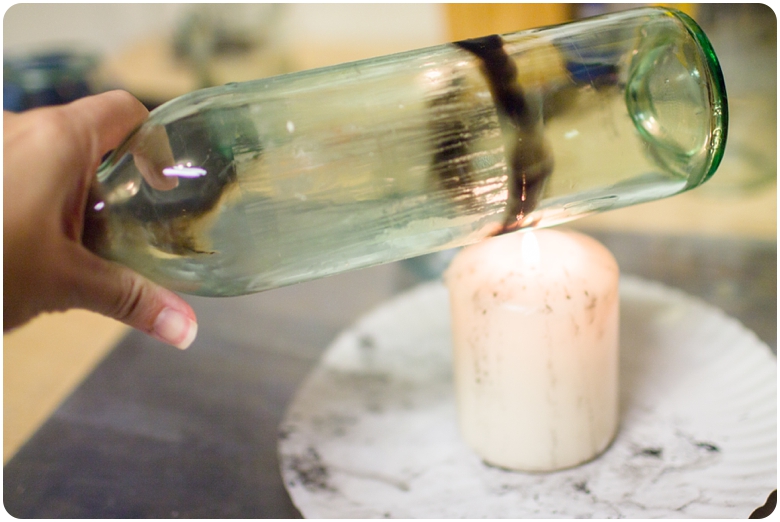
Step 4: Rotate the bottle (just the scored part) above the flame of a candle. For how long? Well, that depends on the bottle. The standard size bottles and cheaper bottles have much thinner glass, so they were quick..maybe a minute or two. But the thicker the glass, the longer this process takes.
[Also, if you have a man around, this candle idea will probably seem primitive to him, and he’ll want to bust out a torch. Don’t let him. A torch throws WAY too much heat. This WILL cause your bottle to fracture outside of your scored line, creating a not so clean cut.]
You’ll start to hear and feel the bottle crack as you do this. Feel just around the burn line to see if the bottle has gotten hot, if it has, move on to step 5.
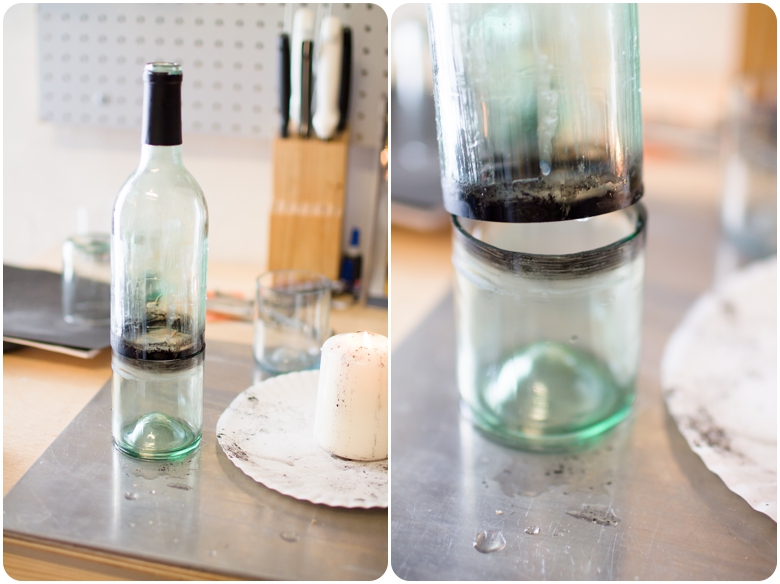
Step 5: Rotate a piece of ice around the scored line. The rapid change in temperature will cause the glass to expand, it will then crack at the weakest point in the bottle…the scored line you created! It’s awesome, and scary the first couple of times. You think it’s going to fall into pieces, but it doesn’t. See below? Awesome!
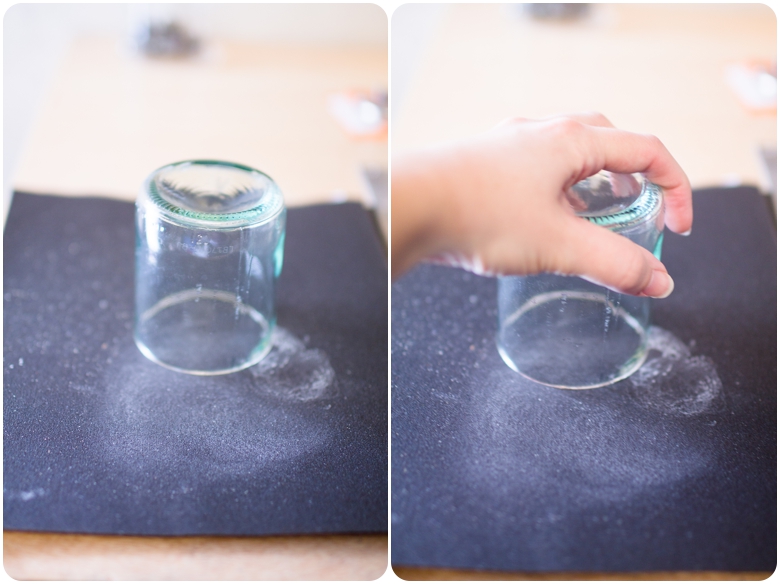
Step 6: Place the cut edge on a piece of wet/dry sandpaper. My picture doesn’t show this, but be sure to wet the sandpaper. I think the wet sand paper creates a nicer finish on your edge.
Also, some may not crack completely smooth. Of the 15 normal size bottles that I did, I had maybe 3 that cracked in a way that they had like sharp teeth coming off of them. I think this was due to accidentally overlapping the score line. Of all the YouTube videos I watched, this by far, is an awesome success! Many will tell you that only a few will turn out right. But this process worked perfectly! The imperfections even on the 3 that weren’t perfect were small enough, though, that I just took a glass file and knocked down the sharp edge. For what I’m using them for, no one will ever see it!
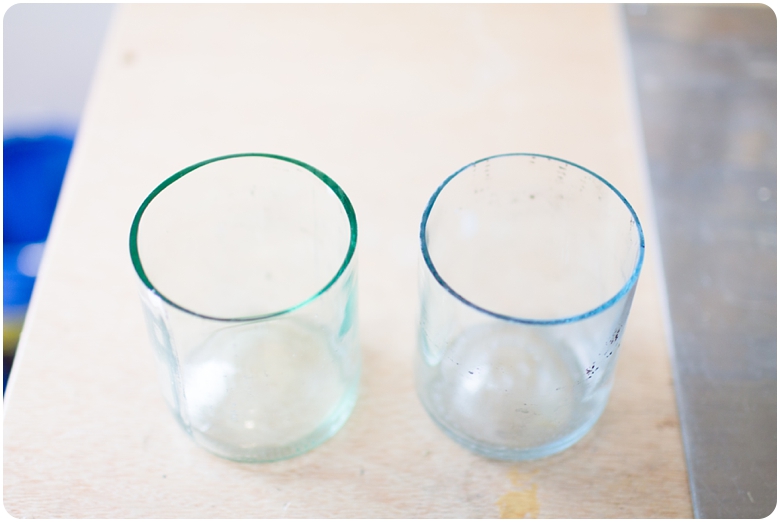
And here’s the final product!
As you can see, these bottles had very thin glass. We unknowingly started with the easiest ones first, thank goodness! Literally, if you focus on the task and have a little assembly line, I’d say you could easily cut 20+ bottles in an hour.
BUT. If you’re dealing with the larger bottles or more expensive bottles with thicker glass, be prepared to be patient! Now that we’re finished with the small bottles, we’ve attempted a few of the larger ones. It’s much harder. It takes a lot longer to heat the glass all the way through, plus because it’s thicker, changing the temperature rapidly with a piece of ice is difficult. Now that I’m writing about it, I’m thinking maybe having a bucket full of ice water to submerge your bottle in after heating it up would be a better solution. I’ll try that tonight and make an update here! 🙂
So, they aren’t necessarily drinking glass quality. Although, if you have the patience to sand these things to a nice edge, they could be! I sanded just enough so that when we’re handling them, we don’t cut ourselves! I would show how we plan to use these at our wedding, but I can’t spoil everything! Buuut after the wedding, I’ll be sure to share the final product! 🙂
Woo! Longest blog post to date. THANK YOU if you made it this far! And if you have any questions about this, let me know!


Leave a Reply